
Idem Clock User Guide
Step 1: Install the app and create your account
To download the app on your iOS or Android device, click on link below.


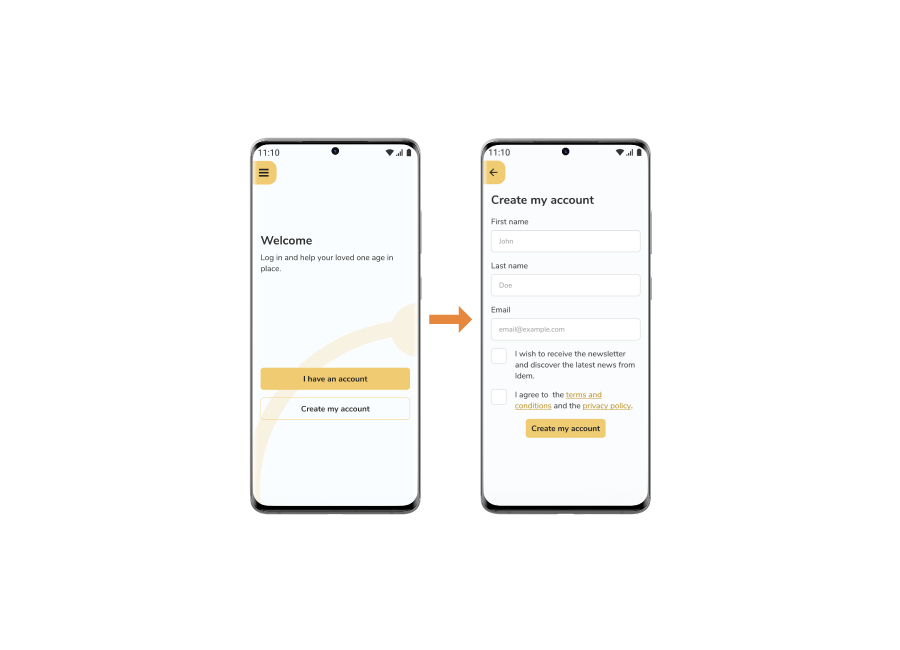
Create your account
Once the Idem Companion App is installed,
- Open the app and select "Create my account."
- Enter your details and click "Create my account."
No password required! Just remember the email address or phone number you used.
- Enter the code you'll receive by email or SMS.
Take a look at the app settings
To configure your app settings, use the hamburger menu in the upper left corner of the screen. Note that these settings only affect your app experience and will not change what is displayed on the clock.
Step 2. Connect the clock to your account
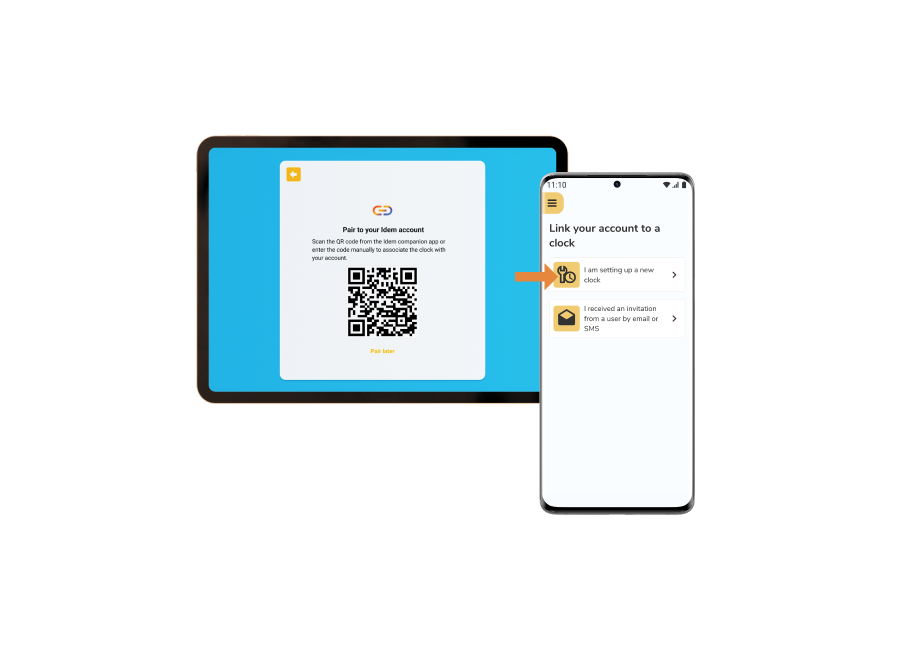
Pair your mobile app account with the clock
Put the clock to an electrical outlet and hold for a few seconds to turn it on.
Follow the configuration steps on the clock's screen.
Once you see the clock's screen Pair to your Idem account, go to the app on your mobile device and tap on I am setting up a new clock.
Scan the QR code displayed on the clock using your mobile device.
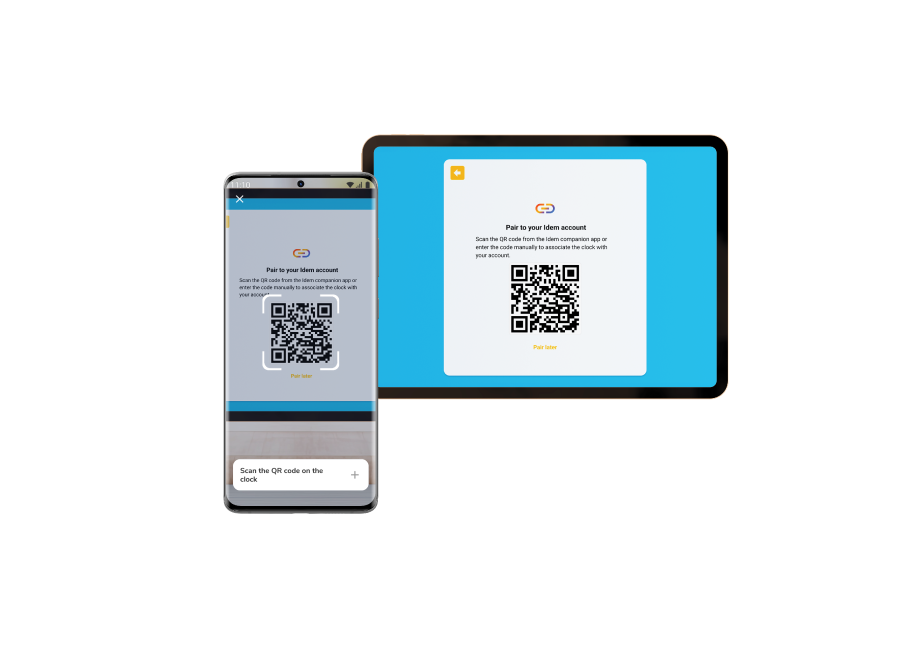
Congratulations! Your clock is now successfully paired with your account, and you can control it remotely.
Choose the internet connectivity option that best meets your needs.
Once your clock is linked to your account in the mobile app, you’ll see the "Subscription to Idem Connected Clock Service" page.
Select your preferred plan and enter your billing information.
If you have a monthly subscription, your clock will use the cellular network for internet connectivity.
If you do not have a subscription, you’ll need to connect the clock to a stable Wi-Fi network.
To connect the clock to Wi-Fi:
- Swipe from the right to the left side of the clock screen to access the menu.
- Tap “Not configured” under Network.
- Select your network and enter the password.
Your clock is now connected! Communications scheduled in the app will appear on the clock.
Explore the clock settings
We recommend that you get to know the clock before introducing it to your loved one.
You can adjust the clock settings either through the mobile app or directly on the clock by swiping from right to left on the screen. Scroll down in the menu to access additional settings.
With the settings configured, you're now ready to communicate with your loved one remotely.
Step 3: Communicate with your loved one
The Idem Clock offers four types of communications designed to help caregivers and family members stay connected and updated. Here’s a summary of the types of communications and their functions:
| Reminder | Message | Event | Note | |
|---|---|---|---|---|
| Sound | Custom sound | Custom sound | Ding | Ding |
| Duration of display | Customizable (1-60 minutes) | 15 minutes | Customizable | Customizable |
| Content read out loud | Yes | Yes | X | X |
| Yes or no request | Yes | X | X | X |
| Interaction requested from the clock | Can tap “I understand” (optional) | Must tap “Read” to open | X | X |
| Photos | Yes | Yes | X | X |
| Number of communications displayed at a time | 1 | 1 | 2 | 2 |
Prepare and send communications
In the mobile app on your phone or tablet, you will need to:
1. Tap the name of your clock.
2. Tap the “+” at the bottom of the screen.
3. Select the type of communication you want to create.
4. Complete the sections as desired, then save the communication.
Discover the 4 types of communication below.

Reminders
Reminders help keep your loved one informed about important tasks or events, such as taking medication. At the scheduled time, a reminder will appear on the clock, accompanied by a ringtone that plays repeatedly to attract attention. You have the option to customize the ringtone, the duration of the display, and the frequency of reminders.
Optional: Pressing the "Understood" button is optional. If your loved one does not press it, the reminder will automatically disappear once the display time has expired.
Optional: Additionally, there is an option for your loved one to hear a voice reading the information shown on the screen.
Optional: You can also choose to send a confirmation request. A question prompting confirmation of the task will appear a few minutes after the initial reminder, and you can customize the delay between the two displays. The display duration for this confirmation will be the same as that of the initial reminder. You will see the answer given by your loved one in your mobile app. If your loved one does not press “Yes” or “No”, the confirmation request will close automatically once its display time is elapsed.
Optional: You can add a photo to accompany the reminder.
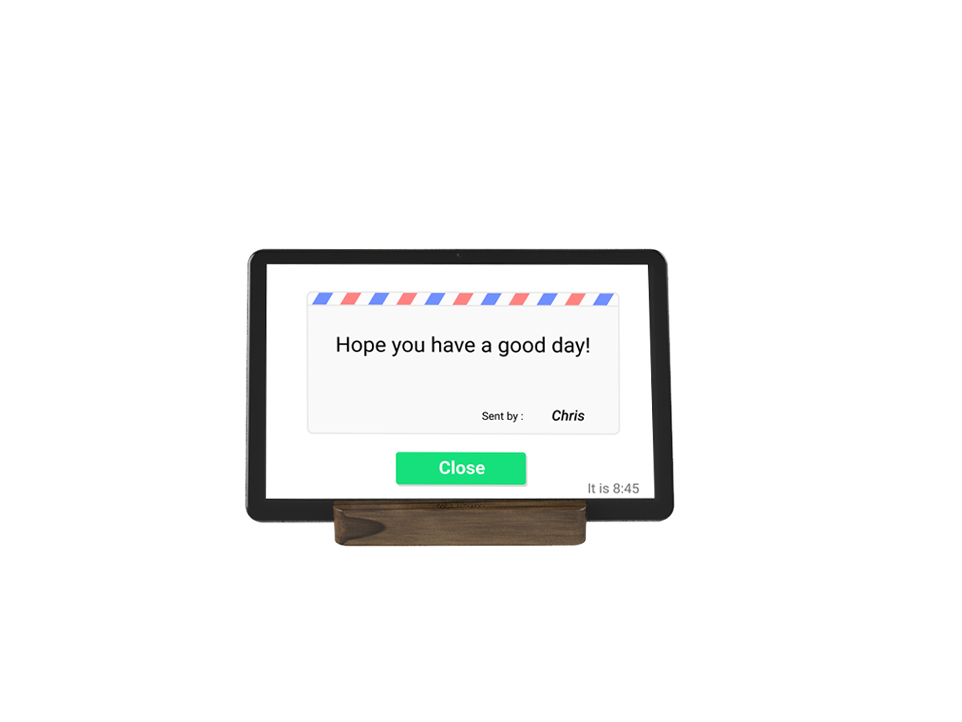
Messages
You can send messages to your loved one that will be displayed on the clock at a scheduled time. A ringtone will play to capture their attention, and both the ringtone and the frequency of the message can be customized.
To view the message, your loved one needs to tap "Read." After reading, they can close the message by tapping "Close," or it will automatically close after a few minutes.
If your loved one did not press "Read", the envelope icon will automatically disappear after 15 minutes.
Optional: your loved one can hear a voice saying what is displayed on the screen.
Optional : you can add a photo to be displayed with your message.
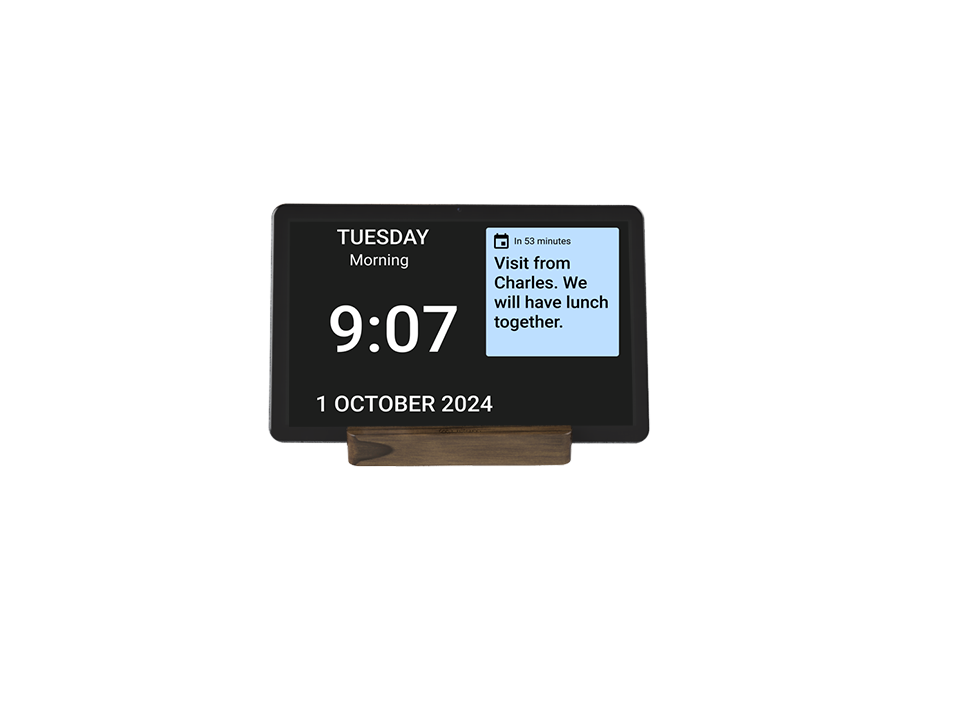
Events
Events are shown as blue sticky notes on the right side of the screen to remind your loved one of upcoming activities. A brief ringtone will play when an event appears (only between 8 a.m. and 7 p.m).
The sticky note will automatically disappear once the event is over. If the event starts in less than an hour, a countdown will appear on the note (e.g., "In 59 minutes"). If a second event is scheduled for later in the day, it will appear below the first, in a smaller size. A maximum of two events can be displayed at once.
Optional: you can also set an associated reminder to help your loved one prepare for the event.
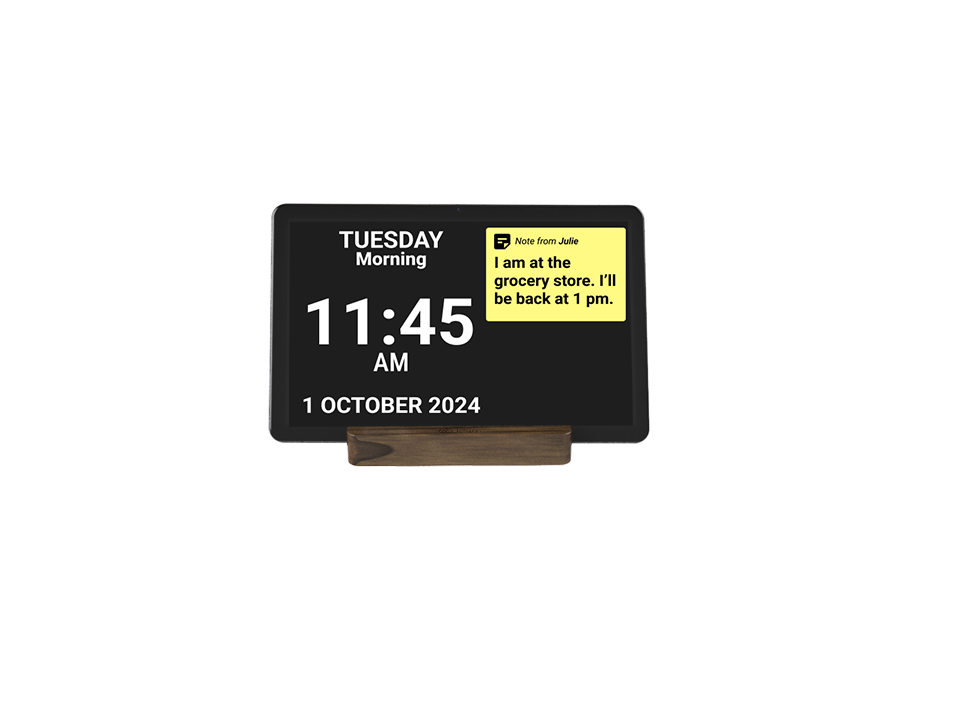
Notes
A note is a short message that appears as a yellow sticky note on the right side of the screen and stays visible for the set duration (e.g., from 5 p.m. to 6 p.m.). When a note is displayed, a brief ringtone will play (only between 8 a.m. and 7 p.m).
Two notes can be displayed at a time. A note can also be displayed at the same time as an event.
Great!
Now you know the four different ways you can communicate with your loved one. We encourage you to try out the different options.
How to modify, delete, or duplicate a communication
To modify or delete a communication, tap on it. At the end of the page, tap on Delete, Modify, or Cancel.
Note: if you delete a recurring communication, you will be prompted with the choice to delete only the selected communication, or all the planned repetitions. The same applies to modifications.
To duplicate a communication, tap on it. At the top right of the page, tap on the three dots and tap on Duplicate.
Step 4: Invite users
Follow these steps to invite and set up another user:
1. Invited User: The invited user begins by downloading the app and creating an account (refer to step 1 of this guide).
2. Main User: In the mobile app, under the clock's name, the main user navigates to the "Users" section. From there, they tap "Invite a user" and follow the on-screen instructions to assign a user role (see the table below for role differences).
3. Invited User: The invited user opens the invitation received via SMS or email and follows the provided steps to connect.
4. Main User: Once the invited user accepts the invitation, the main user receives a confirmation notification.
That's it! The invited user will now see the clock's name in their app.
List of permissions according to user role
| Permissions | Main User (only one possible) |
Invited User | Limited User |
|---|---|---|---|
| See all participants list | |||
| See all communications | |||
| Manage own communications | |||
| Manage users (add, delete, change role) | |||
| Manage communications created by other users | |||
| Modify clock parameters | |||
| Transfer ownership of a clock to another user | |||
| Reset clock |
How to get the best use of the clock
If you want to get examples on communications you can send or read about how to introduce the clock to your loved one, consult our Usage advice page.